You can use Windows 10 and Visual Studio 2022 to generate, debug and analyze Linux binaries:
- Install WSL, restart computer
- Open cmd, type wsl to enable linux prompt, install tools:
- sudo apt-get update
- sudo apt install g++ gdb make ninja-build rsync zip
- Open Visual Studio, on menu Tools - Get Tools and Features, add "Linux development with C++" if you haven't done already:
- In Visual Studio,
- Create new project and select CMake project:
- After project is created, change Local Machine to WSL:Ubuntu. Change Startup item to your project name:
- If Visual Studio notifies you that CMake needs to be updated/installed, let it do it.
- Press debug button to build and run:
- At the bottom of the screen, in Output window, change it to CMake:
- Visual Studio tells you where it has generated the Linux binary. Copy this folder to clipboard:
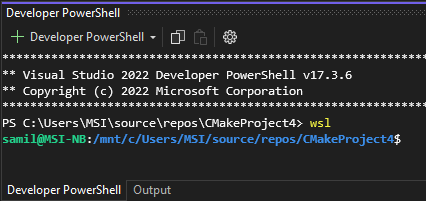
- Go to View - Terminal. In the opened PowerShell terminal at the bottom, type wsl and press enter, the prompt will change to linux :
- Type cd and paste the folder you copied:
- Now you can also run your Linux binary from terminal:
- To use valgrind, first install it in PowerShell by typing sudo apt install valgrind
- Now you can use valgrind on your binary without leaving Visual Studio by typing (replace ./CMakeProject4 with your own project name): valgrind --tool=memcheck --leak-check=yes ./CMakeProject4:
- To copy the binary to a Windows folder, you can open File Explorer from Linux prompt by typing explorer.exe .:
- Congratulations!


No comments:
Post a Comment